WordPress is one of the most popular platforms for building websites, thanks to its user-friendly interface, flexibility, and powerful features. Whether you’re setting up a personal blog, a portfolio, or an online store, WordPress can handle it all. This step-by-step guide will walk you through installing WordPress and setting up your first website.
Step 1: Choose a Domain Name and Hosting Provider
The first step to setting up your WordPress website is selecting a domain name—your website’s address (e.g., www.yourwebsite.com). Choose a name relevant to your content, representing your brand or persona. Once you have your domain name in mind, you’ll need a hosting provider to store your website’s files and make it accessible online. Popular hosting providers often offer WordPress-optimized plans with easy installation options.
Step 2: Install WordPress
Most hosting providers offer a one-click WordPress installation feature. Log into your hosting account, navigate to the control panel (cPanel), and find the WordPress installer. Follow the on-screen instructions to complete the installation. If your host doesn’t offer this feature, you can manually install WordPress by downloading it from WordPress.org, uploading the files to your server via FTP, and running the installation script.
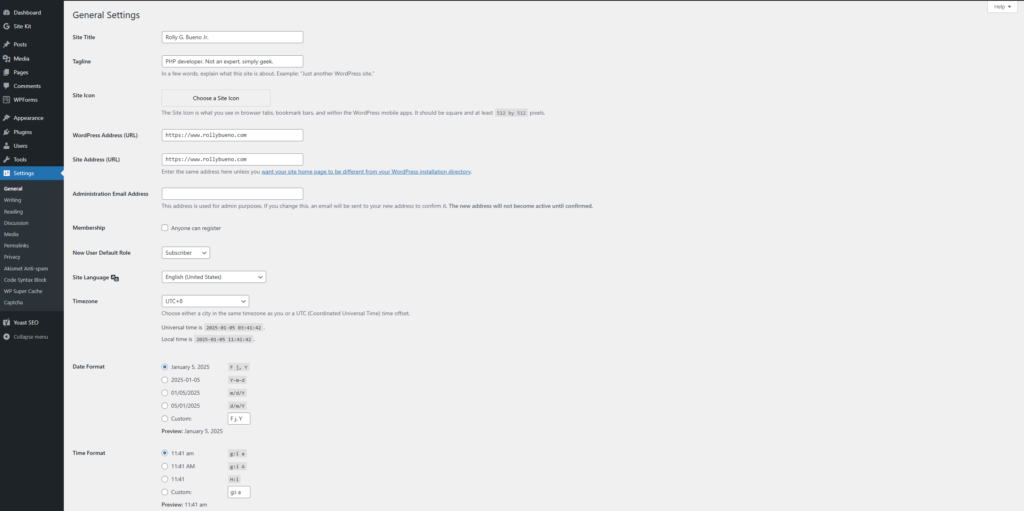
Step 3: Configure WordPress Settings
After installation, you can access your WordPress dashboard by visiting www.yourwebsite.com/wp-admin and logging in with your credentials. Once logged in, head to the “Settings” menu to configure basic options such as your site title, tagline, timezone, and language. This is also a good time to ensure your website’s permalinks are optimized for SEO by selecting the “Post Name” option under the “Permalinks” settings.
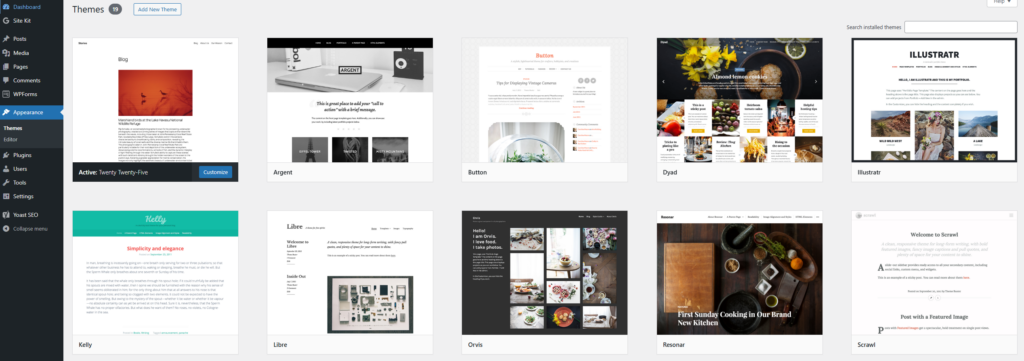
Step 4: Choose and Install a Theme
Your website’s design and layout are controlled by your chosen theme. WordPress offers thousands of free and premium themes to suit various purposes. To browse themes, go to “Appearance” > “Themes” in the dashboard. Click “Add New” to search for themes and preview them before installing. Once you find a theme you like, click “Install” and then “Activate” to apply to your website.
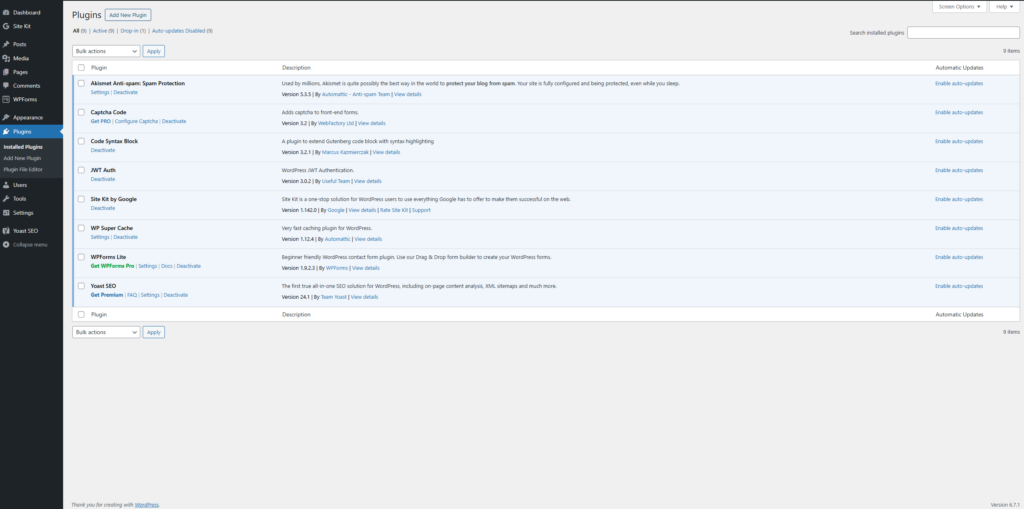
Step 5: Install Essential Plugins
Plugins extend the functionality of your WordPress site. To add plugins, go to “Plugins” > “Add New” in the dashboard. Search for plugins that suit your needs—for example, Yoast SEO for search engine optimization, WooCommerce for eCommerce, or Contact Form 7 for contact forms. Always install reputable plugins and keep them updated to ensure optimal performance and security.
Step 6: Create Essential Pages
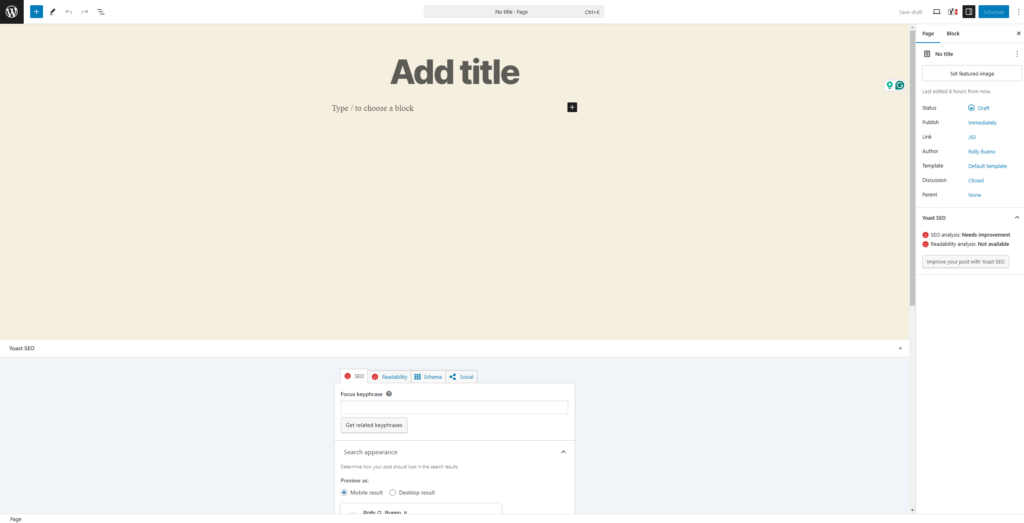
Every website should have a few key pages, such as a “Home” page, an “About” page, a “Contact” page, and any other pages relevant to your niche. To create a new page, go to “Pages” > “Add New” in the dashboard. Use the WordPress block editor to add content, images, and other elements. Publish the page when you’re satisfied with its appearance.
Step 7: Customize Your Site’s Appearance
WordPress makes it easy to customize your website without touching a single line of code. Navigate to “Appearance” > “Customize” to access the Customizer. Here, you can adjust your site’s colors, fonts, header image, and more. Some themes offer additional customization options, so explore your theme’s settings for further tweaks.
Step 8: Set Up Your Navigation Menu
A well-structured navigation menu helps visitors find their way around your site. To create a menu, go to “Appearance” > “Menus.” Add your desired pages to the menu, arrange them in the order you prefer, and assign the menu to a location (e.g., the main menu or footer). Save your changes to apply the menu to your site.
Step 9: Test Your Website
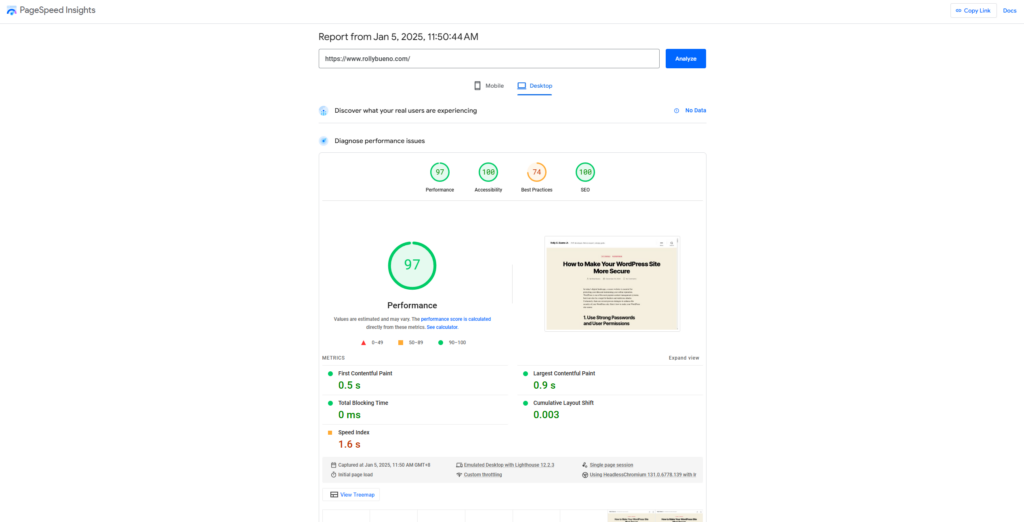
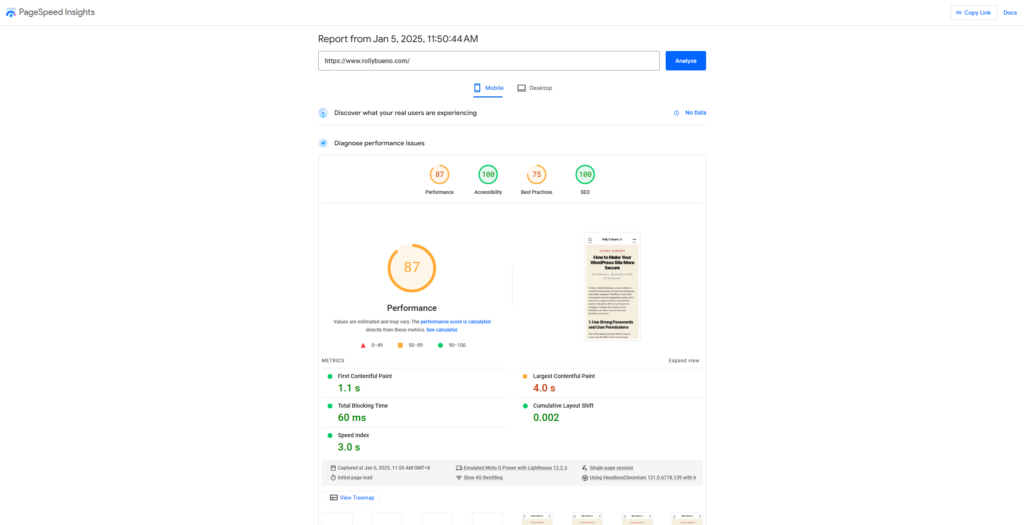
Before launching your website, test it thoroughly to ensure everything works as expected. Check for broken links, test forms, and view your site on different devices to ensure it’s mobile-friendly. Use tools like Google PageSpeed Insights to check your site’s loading speed and make improvements if needed.
Step 10: Launch Your Website
Once you’re satisfied with your website, it’s time to launch! Share your site with friends, family, and your target audience. Promote it on social media, optimize it for search engines, and monitor its performance using tools like Google Analytics.
Congratulations—you’ve successfully installed WordPress and set up your first website! With regular updates, engaging content, and ongoing optimization, your site can grow and thrive in the online world.
Leave a Reply